Vietnam War Models
by W.S. McCallum
You get
strange looks when you tell people your hobby is wargaming. These days most
people assume that means computer gaming, so when you go to the trouble of
telling them that no, actually, you’re talking about tabletop gaming with model
soldiers, the usual response is “oh playing with toy soldiers”, quite often
followed by words to the effect of “at your age?” Apparently playing games on
computers is considered an adult hobby, but playing with real-life miniatures
isn’t - go figure.
Things get
even worse if you mention that your favourite period is the Vietnam War: people
tend to think of things like My Lai, napalm, Agent Orange, the Phoenix Program,
and carpet bombing by B-52s, and it is true that the Vietnam War was a terrible
war, but then what war wasn’t? Regardless, you get some very strange looks and
comments. “War monger” was one name hung on me by an ex-girlfriend for this
particular interest. She was in the peace movement, so her automatic assumption
was that I must be on the other side of the fence. Decades after it ended,
people are still very quick to brandish labels and apply stereotypes whenever
the Vietnam War is involved...
So what is
it all about then? Part of the attraction is recreating history, and gaining an
understanding of how things happened the way they did: how did the greatest
military power in the world come to be defeated by a Third-World country?
Another part of it is the multi-faceted nature of the combat involved: the war
ranged from small actions in the jungles to major land offensives that included
all manner of equipment, over land, sea and air. And then there is the
challenge of bringing it all to life on a tabletop in miniature. That aspect is
perhaps the easiest to understand: it is the same fascination that fuels the
hobbies of model railroading, or making doll houses.
Although
the range of commercially available models available is ever-growing, anyone
wanting to recreate South Vietnam in miniature faces a lot of work. A lot of
scratch-building is necessary, and materials have to be sourced from unlikely
places. $2 shops provide some of the best jungle available in the form of
plastic plants used for flower arranging, whilst pet shops are another place
for resin castings of South-East Asian ruined temples and the like.
So here is
an overview of all the various things required to recreate the Vietnam War on a
tabletop.
First up is
a Buddhist shrine:
This was
made using a hardboard place mat, some plastic stands for fantasy figurines
purchased from Games Workshop, and a little Buddah statue found in a Chinese
herbal medicines store.
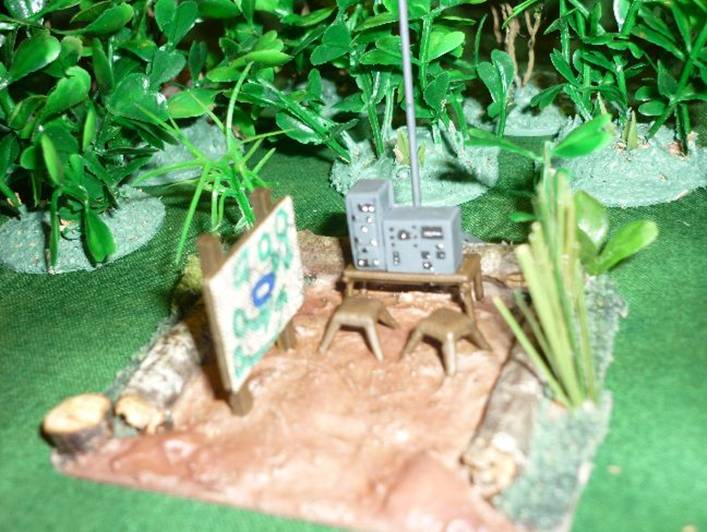
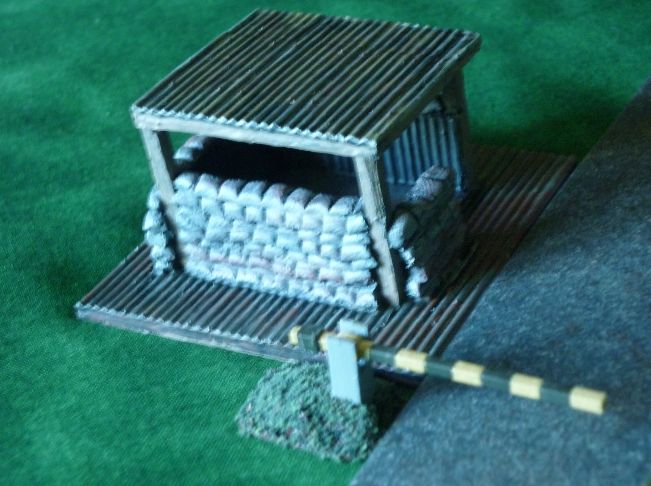
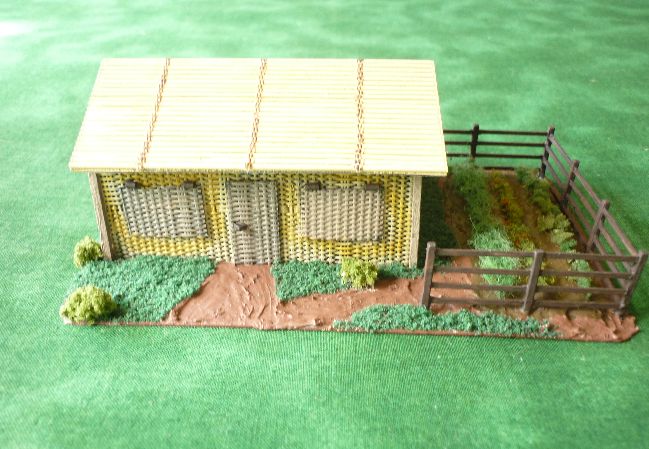
My second
terrain piece was a small command post:
Yes, it's
the venerable bamboo supply dump shelter from the Airfix Jungle Outpost!
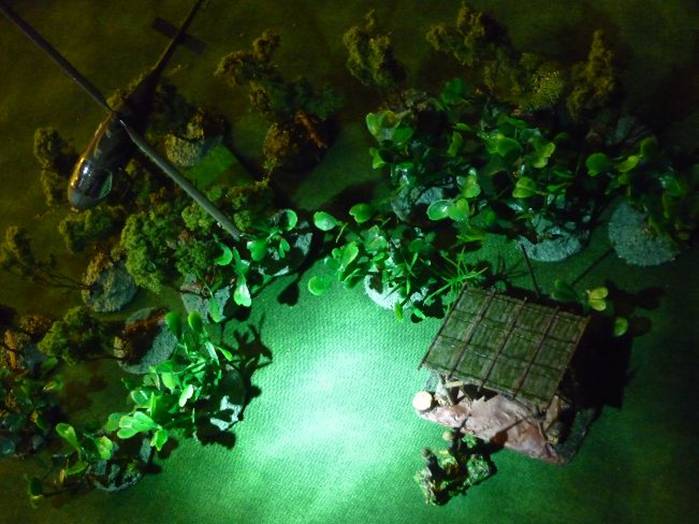
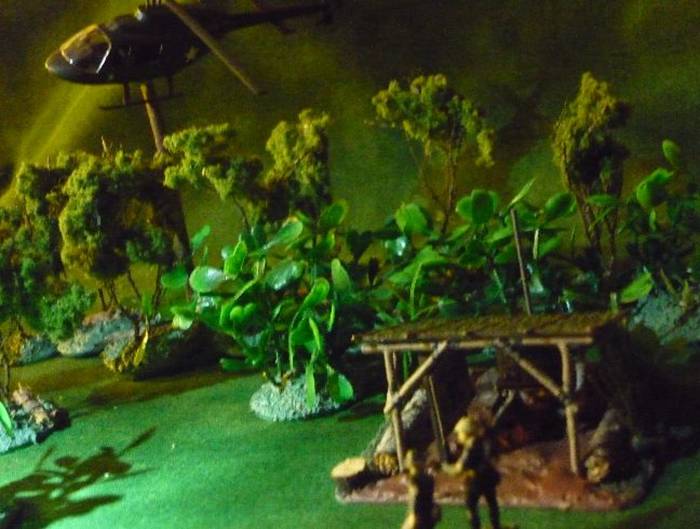
But wait,
what is lurking beneath it?
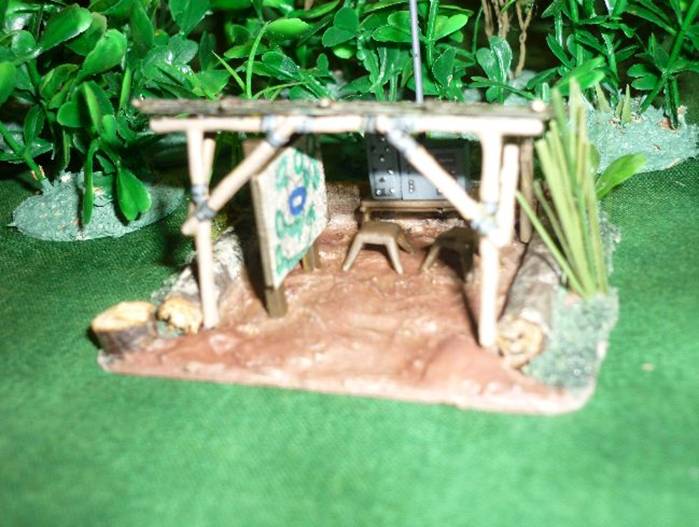
I decided
to use it to make a Viet Cong HQ with map board and radio transmitter. Here is
what it looks like with the roof off:
Some other
early creations were South Vietnamese roadside billboards:
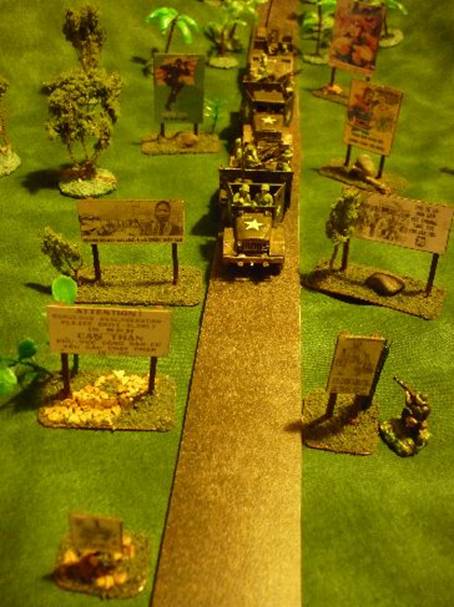
Ideal for
concealing VC snipers and RPG teams...
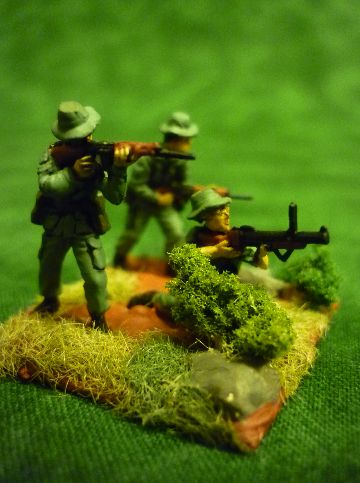
And some
big stuff too - Arc Light craters and incinerated trees:
The
wandering VC gives you an idea of the scale:
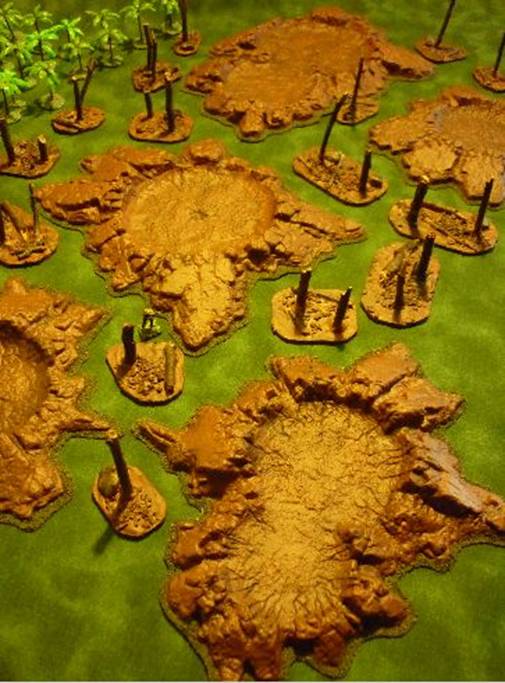
The trees
are acacia twigs and the bomb craters are Games Workshop/Citadel Miniatures
moon craters.
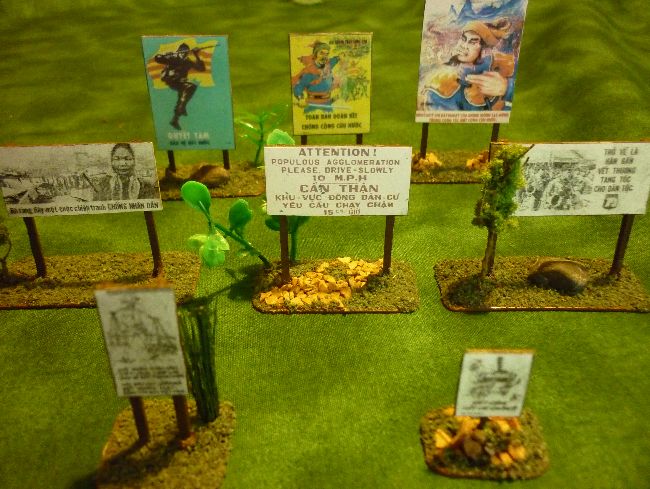
Another
distinctive terrain piece; a VC training area:
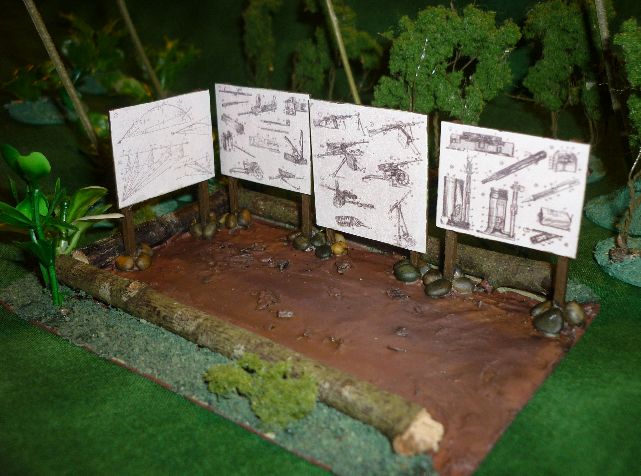
From left
to right, the posters show 1) artillery and anti-aircraft trajectory
calculations 2) the various components of a Maxim 1910 HMG 3) diagrams of
Soviet light, medium and heavy machine guns, and 4) cross-sectional views of
Soviet land mines and fougasses.
The source
of the diagrams was an illustrated Soviet military dictionary (published in
Moscow, 1968) that I sneaked out of Russia some years ago. In the West it would
be considered pretty innocuous stuff, but even these days the Russians get
pretty touchy about foreigners taking supposedly "top secret"
military books out of their country. If you want to export technical books, you
need a permit from the local branch of the Lenin (State) Library, and there was
no way they would have granted it for that one, even if I had greased their
palms...
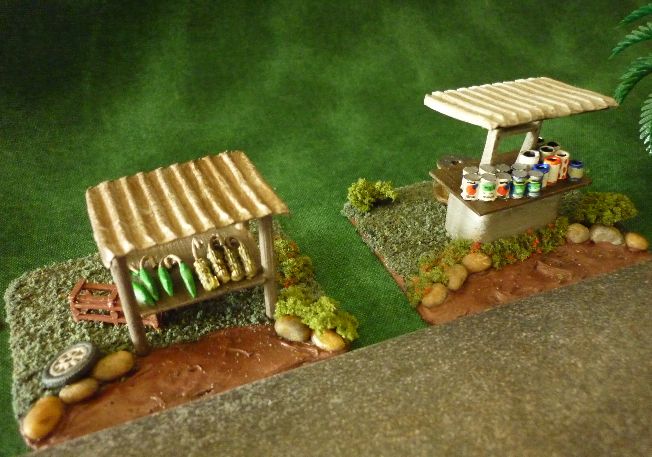
More
terrain pieces:
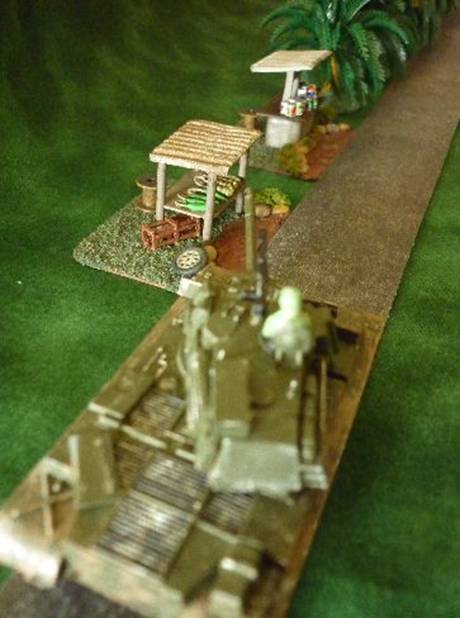
Vietnamese roadside
stalls (and yes, they're meant to look that ramshackle...):
And,
essential for any tabletop recreating South Vietnam; some low-density jungle
vegetation (what the Australians used to call "light green"):
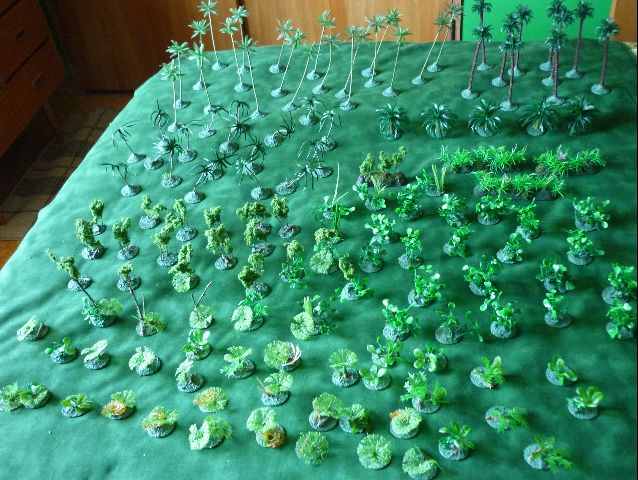
Apart from
the tall stuff at the back and the model railroad scrub (centre left), these
are all aquarium plants.
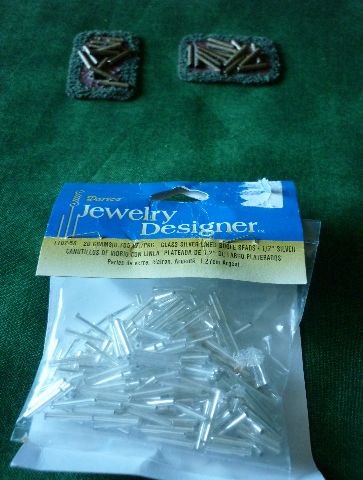
I am always
looking for little odds and ends to strew the battlefield with, and made a
couple of piles of shell casings on a test basis, as they are the sort of
things you see around firebases and even in VC camps (for making mines):
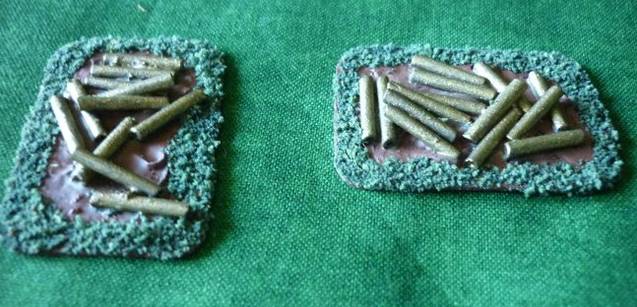
I found the
"shells" in the craft section of a local discount store:
This is an
acacia woodpile I made:

It is easy
to forget that in the 60s, Vietnamese villagers did not have electricity or gas
- they tended to use wood for cooking purposes. And still do apparently - a
friend of mine said his salient memory of visiting Vietnam was landing at
Saigon airport at night and seeing all the little home cooking fires in the
moonlight from the air.
More
battlefield space fillers - septic tanks:

These are
also useful for firebases, villages, or even town settings.
Having used
the supply shelter in the Airfix Jungle Outpost for an HQ hut, I was then left
with nothing to put supplies in, so I scratch-built these ones for my VC base
camp:

This is the
first piece for my firebase:

This is a
resin piece by Frontline. To provide a bit more flexibility, I made a flat
corrugated iron roof for it:

This is in
case I want to use the sandbagged post on the roof as a checkpoint etc.:
Here is a photo
of the aforementioned item with a couple of my old ESCI figures from 20 years
ago:

It is a
good match for 20mm/25mm figures, but it is a bit small for 28mm figures - for
example, you wouldn't be able to put the roof back on the sandbagged position
because they are too tall.
The casting
needed a bit of tidying up (mainly excess resin due to bubbles in-between the
sandbags), and a bit of filling (holes due to bubbles), but I have seen far
worse.
The
"Garage du Mekong" was my first civilian building:

It's a
conversion of a broken Faller N-scale German garage that I picked up in a sale
for a couple of bucks 20 years ago, and which I always thought could fit in
nicely in a South Vietnam setting. It took a while, but I got there!
And here is
a scratchbuilt bar:

This the
first of various bars I made, based on photos I found on-line of a row in them
in Vung Tau circa 1968. It was a quick and easy job, as I used a rectangular
downpipe connector for the building itself.
Here's
another ramshackle building, along with some old ESCI figures for scale
purposes:

It was a quick
and easy project, using a cut-up floor tile for the walls. It's loosely based
on this building in Vung Tau (1968):
And here is
a variation on the theme of the earlier building I did:

Small, ugly
and ramshackle, but it looks the part - a newsstand:
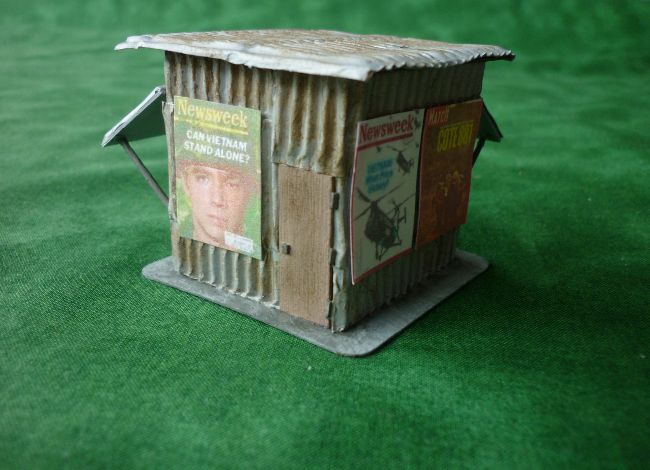
The roof comes
off, as this would be a good place for hiding a VC sniper... I also put some
period magazines with Vietnam-related covers on the counter, although you can
hardly see what they are in 1:72nd scale:

Getting
away from rusting corrugated iron for a while, here is a French-style building,
from Vietnam’s colonial period:


I wanted a
semi-rural French-style building rather than a farmhouse and it has come out
looking OK.
For the
walls I used a cut-up floor tile:

These
stone-finish tiles have the advantage of not requiring painting - a quick spray
coat of matt varnish and they are done.
For the
roof tiles, I used some of a roll of this stuff, found in a $2 shop, which is
normally cut up and placed in the bottom of drawers:

A very
cheap source of roofing material!
I grimed up
the roof and gateway tiling up a bit with diluted India ink, but it didn't come
out in the photos above.
I was also
watching footage of the battle of Hue, and noticed some nice-looking urban
walls with railings, and decided I had to have some:

They are
cut from square wooden dowel. The stone balls are plastic craft beads, and the
metal railings are from the old Airfix Zoo Set.
Designed
for World War II wargaming, but just at home in Vietnam, are the Italeri
Quonset Huts:


I kept the
Mekong Delta mud off these ones and just gave them a slightly weathered look,
as I will probably be using them for WWII wargaming too.
They are
very good quality kits and assemble nicely. The plastic the walls are made from
is fairly thin and bendy though:

Consequently,
basing them is advisable.
Here are
some additions to my firebase:

Like the
earlier piece shown on this age, they are resin castings from Frontline. These
particular items needed a lot more preparatory work - there were a couple of
dozen air bubbles in each building, which required a lot of tedious filling
work, and I needed to do some cutting and filing of extraneous material too.
The end results came out looking good though.
And here is
another battlefield filler - some stacked supply depot containers:

I made it
from plastic craft beads:

Two observation
towers:

I picked up
these two old observation towers second-hand 20 years ago. The best I could do
was slop some paint on them, base them, and hope they don't look too bad, as
the original paintwork on them was awful and, try as I might, I just couldn't
get it off.
Two small
non-descript buildings that could be used in a variety of contexts:

Made from
leftovers from the Quonset huts kit and a couple of clear plastic display cases
for diecast cars.
A village
covered market/VC base camp meeting hall:

A storage
shed:

Various
hooches:


As you can
probably tell from the last photo, the roofs are removable.
A village
market table:

This is a
child's toy I found in a charity store for 20 cents.
And a well:

Something I
also found in a charity store. Some sort of weird decorative piece that happens
to be in 1/72nd scale!
A hangover
from the Indochina War in the 1950s: a Poste kilométrique:

I put a lot
of rust on the corrugated iron roof as I figured the ones that survived into
the 60s would probably look worse for wear. I used two plastic downpipe
connectors glued on top of each other for the tower, then wrapped them in
textured wallpaper, and drybrushed the paint on to give it a weathered concrete
effect.
The roof
comes off so you can put a garrison detachment in it:

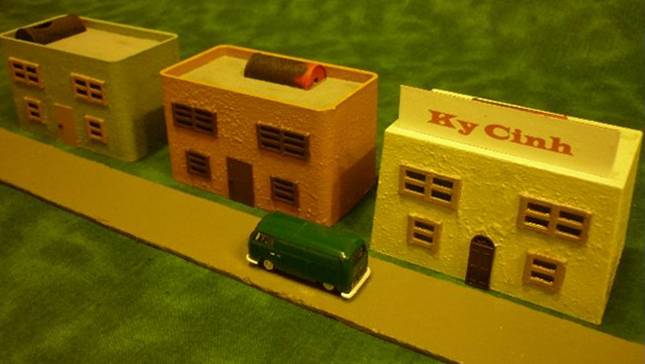
Some town
buildings: Two of these were also made using downpipe connectors. The other
building is another a diecast display case that I repurposed:
I also made
some vegetable patches and a couple of animal pens to go with my hootches:

And I made
a few fences from a plastic textured placemat and matchsticks:
I purchased
various period diecast cars to bring my South Vietnam terrain to life, and
consequently had a stack of these display cases lying around:

Hmm, what
if we glued the base on top?

And sprayed
a bit of base flock on the walls and used some scrap plastic for a roof
ventilation unit...

End result:
South Vietnamese girly bars!


That gives
me 5 of them now - should be enough to keep the troops happy...
These two plastic
tents were left-overs from different sources and are now ready for adding to my
firebase:

The big one
is another charity store find - the canopy off a toy truck.
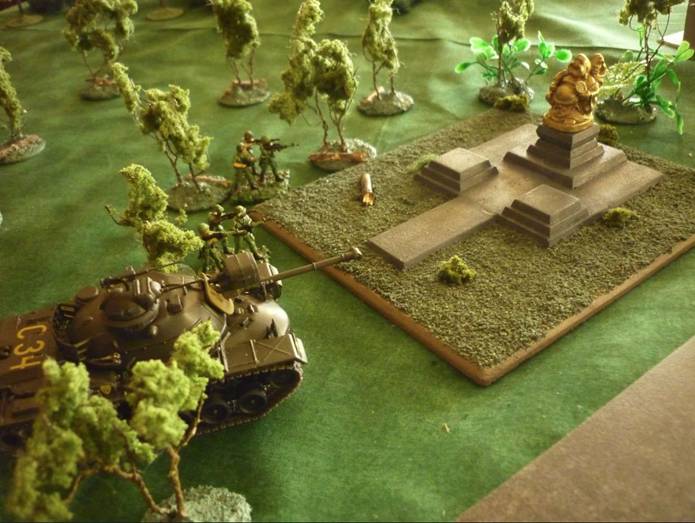
A roadside
monument to the Free World forces, based on "The Flags" monument that
stood in Vung Tau in the late 60s:

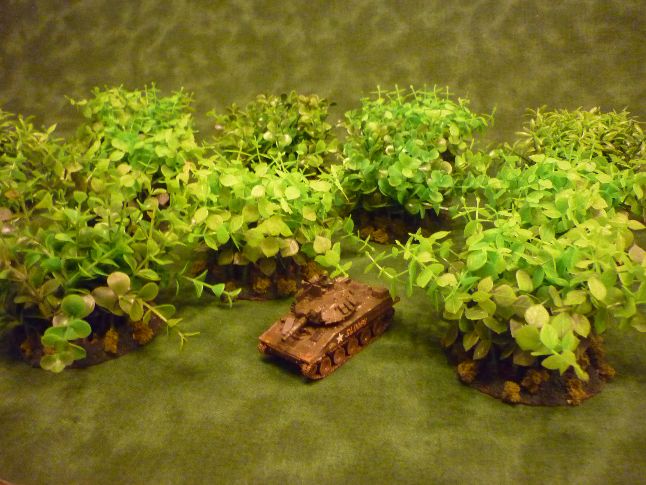
And a dozen
thickets as stage one of my dense jungle construction plans:
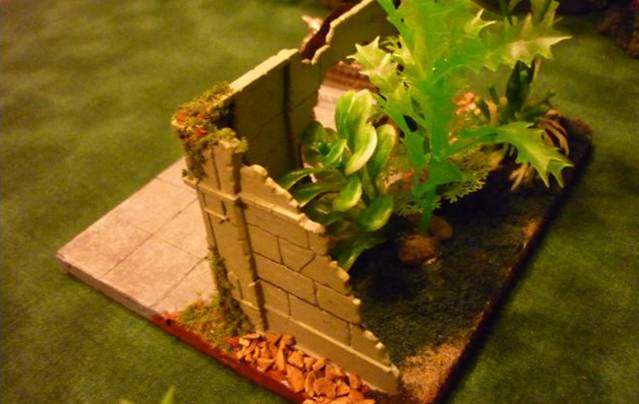
As an
alternative to the Chinese Buddhist shrine that started this page, here is a
ruined South-East Asian jungle shrine:


And another
town building:

The signage
was swiped from a popular cinema that operated in Saigon in the 1960s, and is
still operating.

I scoured
the Internet for period Vietnam-related film posters and found a a couple of
South Vietnamese ones, as well as obscurities like "A Yank In
Viet-nam"("Fire Hot Adventure in the Time Bomb of the World!")
and "Operation CIA" ("The CIA in Saigon - The Hottest Spot on
Earth!") as well as the French release poster of The Green Berets, among
others.


Here is the
building in its "naked" state. I used a plastic Ferrero Rocher
chocolates container with a plastic box glued on top that orignally held
bulldog clips:

And here is
a South Vietnamese bike and motorbike repair shop:

This was
another 20 cent find in a local charity store that was originally a Hot Wheels
tunnel.
While I was
painting it, I noticed "Made in Vietnam" stamped on the bottom of it.
It'll be nice to have something on my Vietnam War tabletop that actually comes
from Vietnam.
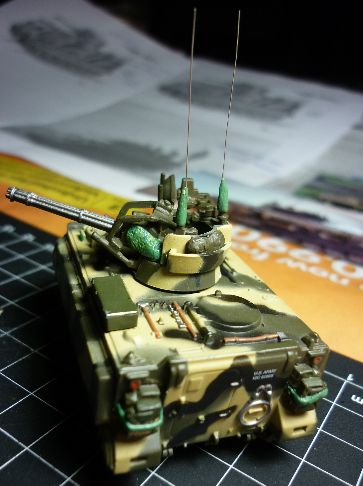
Here's
something to keep the Free World Forces on their toes:

My first
completed tank project in 20 years! I couldn't find/make any decent decals, so
I hand-painted the stencilled numbers on the turret.
And some
building kitsets - the Italeri ruined building (in the background), and a Kibri
fountain:

With the
knobbly bit on top, I thought the fountain looked suitably Asiatic.
An NVA
T34/85:

And another
20 cent find in my local charity store, which looks perfect as a South-East
Asian burial mound:

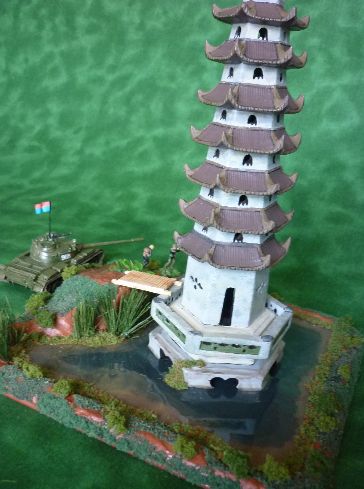
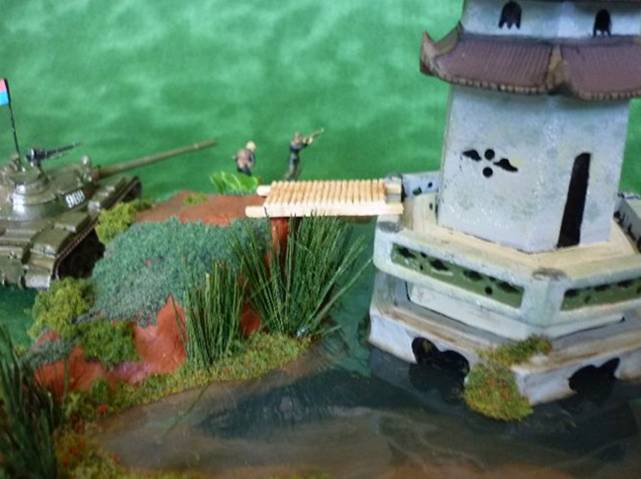
I was
looking for a suitable to-scale pagoda for a while, and finally found one:

This one
cost me $3 from a charity store. It is actually a garden water feature made
from jade and terracotta, so I thought I would give it its own little water
setting:
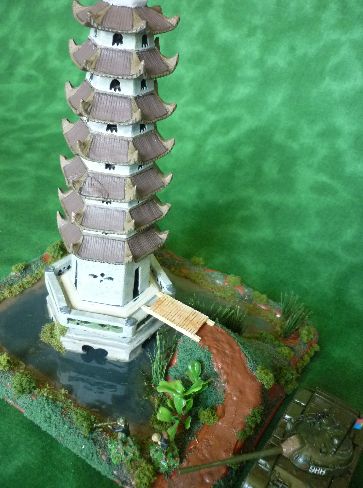
I used
Norski Kleer-Kast resin for the water and it gave a nice effect, although I had
some problems with shrinkage around the water edge (which I covered up with
"pond weed"):
I also made
this non-descript slum shack:


It is an
old (1960s) railway building kit I found in a second-hand furniture store:
Here's a
miscellaneous batch:
These are
some left-overs from some Zvezda kits I have been making recently (part of
their "Art of Tactic" game), repurposed as NVA position markers.

A couple of
NVA ZIS-3s, courtesy of Italeri. I have decided to base my artillery crew
figures separately, so I can keep my options open for skirmish gaming,
different rule sets etc.

A Hobby
Master M8 armoured car. This was originally in Brazilian WWII markings, so I
did a bit of repainting. I purposely left markings off so I can use it for ARVN
and other Free World forces.

A Ho Chi
Minh Trail truck. This is a conversion project I started 20 years ago but never
finished. It was originally a Hasegawa WWII Japanese starter truck.

And some
Roco 105 mm howitzers, which were also sitting around for 20 years waiting to
be painted and based. Centrepieces for my firebase (still in progress).

The
ultimate tabletop accessory: a firebase clothesline:

It could
easily double as a VC clothesline too, I suppose.
An NVA 37mm
AA gun:


This is a
conversion job involving the Airfix Bofors gun, Italeri ZIS-3 wheels, and the
gun mount from a Moldovan resin kit which turned out to be more trouble than it
was worth. In retrospect, I should have got the Zvezda kit, which would have
been a lot easier and cheaper...
And a
couple of more charity store finds converted into South Vietnamese buildings:
A covered
market, made from a child's mini toy crate, turned upside down.

And a
shady-looking warehouse, made from the broken bits of a plastic fire station.
Work in
progress: my armour workshop:

These are a
range of 20-year-old kits and conversions being given an upgrade, and some new
Altaya diecasts that I detailed:
At a model
railroading convention I turned up some likely looking suspects for South
Vietnamese buildings.
This looks
like the sort of pad a provincial governor would reside in:


And how
about this more modest abode for the local CIA guy?


Both of
these Faller kits came ready-assembled and the only painting I did was the pond
out the back of the governor's residence. Then I flocked the bases and they
were ready to go.
Detailing
work done on the Altaya Duster in the armour workshop photo above:

I added an
aerial, crew, lots of ammo and splattered on a bit of mud. It should be noted
if you are going to buy this model that the front and rear wheels are glued on
the wrong ends of the chassis. It seems to be a systematic error in all of them
as the Altaya Website shows the same error. Consequently I had to saw these off
and reglue them the right way round.
Detailing
work was also done on the Altaya Vulcan:

This
particular vehicle had a night scope on the turret rather than a range-finding radar.
I added the chair as a result of the earlier photo found (there were two, but
that would be too fragile), and the commander in the turret.
Urban
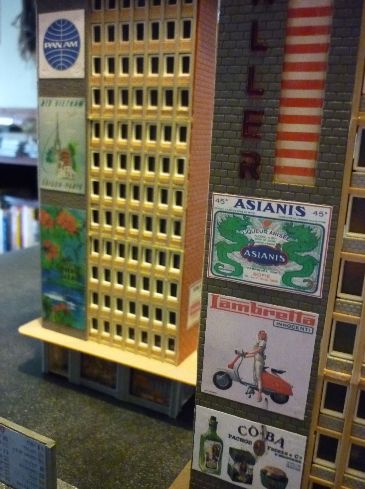
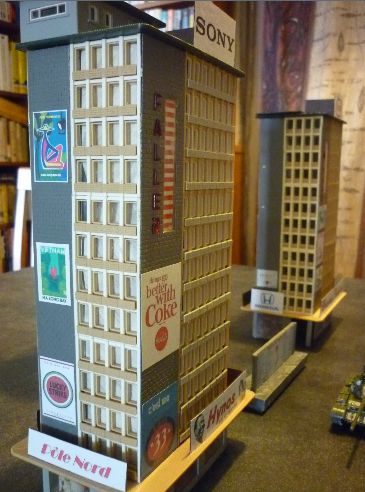
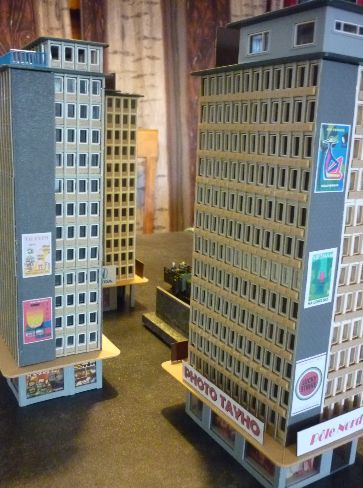
extension continues - tower blocks:

These are
Faller kits that were first released in 1965, but are no longer available, so I
was very happy to find 3 of them cheap and second-hand at a model railways convention
recently. One of them required some repair work, but apart from that they were
already assembled, so all I really had to do was scour the Web for suitable
billboards and signage:
Here are my
first Vietnam infantry figures in over 20 years - an ARVN Ranger platoon:

These are
Elhiem 1/72nd scale figures.
And some
photos of various stands:


"So
that was 4 pots of pho, 4 fried chicken wings with rice, 2 curried frogs legs,
6 Cokes, 3 beers, and a Fanta?"

This used
to be the Oxford Models Walls Ice Cream Cart:

The rough
and ready Coca Cola sign was rescued from a model railway building and had been
sitting in storage for over 20 years. The bottle is yet another 20 cent find
from my local charity store. I think it used to be an ear-ring.
Here's
another batch of buildings, completed while I toiled away painting my ROKA
platoon:
This is a
model railroad kit, picked up second-hand for a dollar and given a quick
makeover to Vietnamise it.

A
sandbagged control tower/watch tower, converted from a model railroad kit I got
second-hand for $2.

Including
the first of what will probably be a whole heap of homemade sandbags by the
time I am finished building my firebase....

The
container with rest area was another charity store find for 20 cents: the
container came from a toy truck.

ROKA
infantry platoon 1965-1967

The Korean
Army deployed in Vietnam in 1965 using pretty much the same equipment and
uniforms that they used in the closing stages of the Korean War. The only major
difference was that US Marine style camouflage was widely used in ROK Army
units in Vietnam. This fortuitous circumstance allowed me to use IMEX's 1/72nd
scale Korean War infantry with a camouflage paint job, and with a few ringers
added to fill some gaps.
Forward
observer:

Platoon command
group:

Squad
leader:

Super
bazooka team - I initially had my doubts about whether these were actually used
in the field (so bulky), but did find a photo or two of Koreans lugging these
things across paddy fields in Vietnam:

M1919A6
machine gun team (yes, they're Airfix US Marines!):

Rifle team:

Browning
automatic rifle team:

Sniper:

And a
couple of new creations:

Two
scratch-built Quonset huts.

These are
more suitable for a firebase than the Italeri ones shown earlier, which are
quite large (comparison photo).
A batch
from the vehicle refurbishment workshop shown earlier - Airfix Sheridans. I
bought these three kits in the early 1990s, and painted 2 of them prior to
abandoning wargaming in 1992. The third, CC Rider, lay half-assembled and
unpainted for 21 years.

A couple of
these have already popped up in earlier photos, but it was time for an upgrade,
so I did a bit more detailing (radio aerials, dust covers for the searchlights,
new gunshields and commanders) and repainted them a bit.


ARVN
armour:
An M41
Walker Bulldog:

An M8 scout
car and an M24 Chaffee:

The scout
car was shown earlier on: I fitted radio aerials, grubbied it up a bit and gave
it a commander.
The Chaffee
is an old Matchbox kit that was surplus to WWII gaming requirements, so it has
been redeployed.
Over a
couple of years I invested extensively in (= squandered money on) Altaya
diecasts from the Combat Tanks Collection magazine series. Now the problem with
this was that every one of those vehicles comes on a stand and in a clear
plastic case, and being a wargamer, those vehicles are not for display.
Consequently
I had a whole box full of these black plastic stands:

Not being
one to waste anything, I got to thinking that if you cut the ends off these
stands and put them end to end, you could make dirt roads out of them:

For
reinforcement, I used Liquid Nails to glue them onto strips of hardboard:

And I used
Liquid Nails to fill the holes in the stands, the gaps between the stands, and
to roughen up the edges, as well as to anchor a few plastic plants along the
edges:

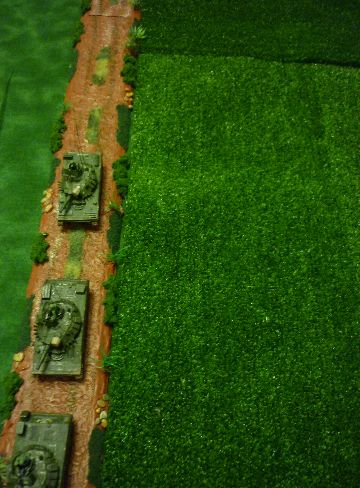
The stands
were then painted and flocked (there's around 20 feet worth of roads in the
photo):
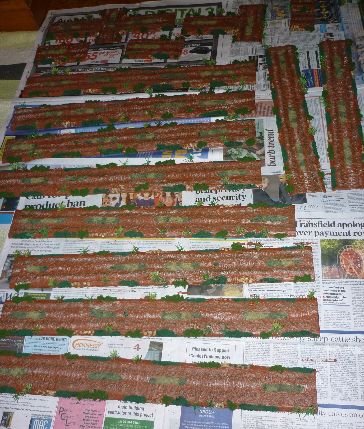
The
finished result doesn't look too shabby for something made from scrap plastic:

The next
step was to find a use for all the clear plastic cases:

Here is a
prototype of a tower apartment block (work in progress):
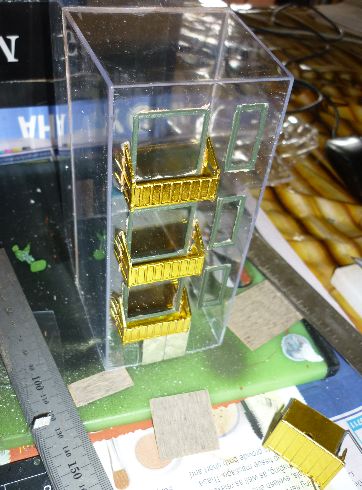
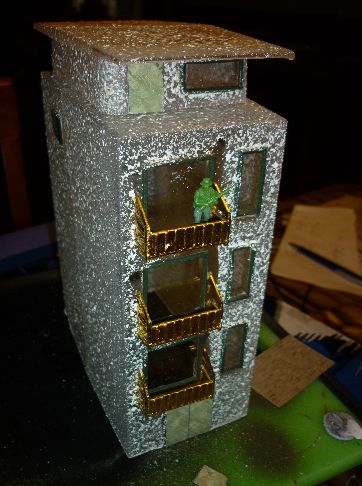
The
penthouse roof is the bit off the end of the glued together cases that I had to
saw off to get the base flush.
The window
frames are cut from the plastic mesh that those plastic plants we all
know and love come on.
The
balconies are from some cheap plastic trucks I got from a $2 shop.
Floquil
"shotcrete" finish was then sprayed on with a can. Now all it needs
is a bit of detailing and some paint...
A preview
of some of my 1/72nd scale plastic ANZACs...
A Call To
Arms released its "British Infantry of the 1970s" set: This is the
old 1/32nd scale Britains figures resized to 1/72nd scale.
I thought
it would be relatively easy to convert these to Vietnam War ANZACs. Before and
after shots:
![]()


Replacing
the GPMG with an M60 took a bit of work, but it turned out OK. I decided to
hack that handle off though; it didn't look right.
Two more
detailing jobs:
First up is
an Altaya gun truck, which I merely muddied up a bit and added a crew to:

The quad AA
mount came with quite a nice paint job:

And an
aquarium piece, repurposed as jungle terrain:

A cheap way
of practising my helicopter painting before I start on the real thing.
Two months in
the making: my two ANZAC platoons and various ancillary elements: Comprising
two platoons (one of Australians and one of New Zealanders), a mortar unit, 3
snipers, 4 AFV crewmen, and a company command stand.
The NZ
platoon (with yellow 1944 pattern webbing to differentiate them from the
Australians):
A couple of
AFV crewmen wearing black armoured corps berets:

Company
command stand:

Forward
observer:
Mortar
team:
Platoon
command stand:
LAW team
(side and front views):
M60 team on
the march:
A rifle
stand:
And a
sniper!

To
accompany them, I made an Australian long wheel-base Landrover:

This was
converted from the Airfix kit, which involved a bit of work. As the Airfix
model is of a British Gulf War Landrover, the front end is all wrong for a 1960s
vehicle, so I had to add roo bars (scratchbuilt), redo the lights and radiator
grille, and add the circular unit marker. I added lots of dust and mud as these
vehicles look filthy in all the colour pics I've seen of them.

The side
doors also had to go, and seats and a cutaway needed to be added at the back.
It's not perfect, but it should do as a ride for my ANZAC HQ unit.

The second
of my downed helicopters, this time a Cobra:

The model
is a relatively cheap diecast from the Helicopter magazine series.

Some more
jungle terrain. These are all aquarium ornaments:

I did some
flocking here and there just to give them some more detail.

These rock
formations are quite large, so I thought I would make some smaller ones of my
own using spray-painted pumice from my local river:

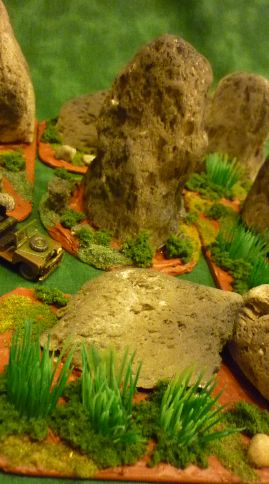

The pond
was made using two-part resin laid over a painted hardboard base, with some
flock and grasses thrown in for pond weed.
Some rides
for my ANZACs:

One
garden-variety Australian M113, followed by two M113s with the T50 turret, and
an M113 Fire Support Vehicle (all Airfix kits, converted to a greater or lesser
extent).
The Airfix
Fire Support Vehicle version has all sorts of annoying inconsistencies,
starting with the name on the box ("U.S. version" - in which parallel
universe did the US Army field them?). The vehicle transfers provided are for
Australian Army vehicles that did not serve in Vietnam, so it was hand-painting
time. Also the smoke dischargers were not used in Vietnam, so they are
superfluous, as are the side skirts. The turret-mounted MG didn't look right,
so I raided the bits box for a replacement, and the main gun's barrel needed a
cooling jacket fitted, so one was added made from green stuff. The turret is
missing its radio aerial mounts, so I added them and also used some fuse wire
for the aerials. Lastly, a spare road wheel was added to the front. A final
note regarding the positioning of the MG: I noticed in various photos that the
commander slung the MG around so it was sideways when travelling - I'm guessing
this was to provide a little bit of added protection against hostile fire.

Two M113s
with T50 turrets. The turrets are scratch-built, based on toothpaste tube flip
caps, with a plastic ring mounted on each one, with the top sculpted from green
stuff and with bits of plastic and plastic card added.

The vehicle
names are a bit larger than they should be - a trade-off in terms of on-table
legibility and me not going cross-eyed painting them.

A
characteristic of Australian Army M113s in Vietnam: large letters on the back
door - I'm speculating they did this so infantry wouldn't climb into the wrong
vehicle in the heat of the moment during a firefight.

And the
garden-variety Australian M113. Gun shield converted from the ACAV model, using
green stuff to extend the sides.

I was
excited when the Helicopter Magazine issue with the H21 Shawnee "Flying
Banana" finally reached my local newsagent's.

The cockpit
canopy is a clip-on-off job so crew can be added. You might have to chop off
the pilot's and co-pilot's legs though as it's cramped in those seats:

The
instrument panel is fairly well detailed for a diecast too.

I now have
enough of these to refight the battle of Ap Bac one day (on a scale of 1 = 2 -
I worked out my table couldn't fit 10 of them; they're quite large beasts...)

And here
are the Australian Centurions:

These were
converted from the Altaya Korean War British Centurion that was one of the
early releases in the Combat Tanks Collection magazine series. That will be
easy, I thought. Little did I know...

The
Australians added a 50 gallon fuel tank to the back of their Centurions, which
had to be scratchbuilt, and then I had to do a fiddly little extension to the
tow cable moulded onto the metal hull in order to account for the extended
length.

As well as
adding the pintle-mounted turret machine gun, I had to scratchbuild the turret
rack from bits of plastic tubing. After scratching my head for a while and
failing to find any scale plastic mesh that would be right for the sides of the
rack, I cut up strips of lace curtain, spray painted them, and superglued them
on.

The
Australians also used a different main gun barrel, so the barrel had to be cut
to a different length and the smoke vent thing had to be added (hand-carved
from green stuff), and the coaxial machine gun was mounted OUTSIDE the canvas
cover over the gun shield, unlike on the British Centurions.

But the
major job was cutting off the metal mudguards with tin snips and having to sand
down the sharp edges left behind with a sharpening stone so you don't cut your
hand on them when you pick them up. Then, once I got them off, I realised that
to save money, Altaya had left off the return rollers in order to save on
production costs since you can't see them on the original model, so I had to
cast around for 32 that would be the correct size (an old Airfix Churchill kit
was cannibalised). Oh, and I also had to fill large gaps along the sides that
were visible once the mudguards were removed.
So little
wonder it took me two months to get around to finishing these firebase rations
stores:

These are
craft beads (that hopefully now look like cardboard boxes turning to weetbix in
the humidity) inside the cut-up bottoms of rice cracker packets. For the photo
that inspired them, click here:
http://i777.photobucket.com/albums/yy60/markmeuleman/maryann4.jpg
PS: If you
do buy the Altaya Centurion, please note that they put the smoke dischargers on
UPSIDE DOWN.
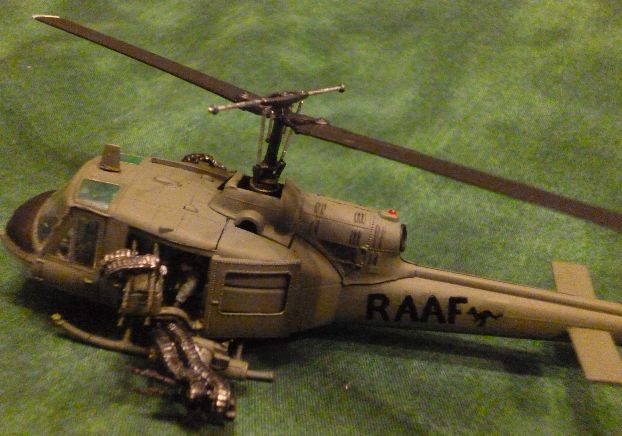
This
conversion was the first helicopter kit I have done in over 20 years...
First of
all, I had to assemble a UH1-B as the platform for the particular aircraft I
wanted to make...

Those
Italeri kits are just as fragile and fiddly as I remember them, and the front
window in the cockpit STILL doesn't fit.

This
particular RAAF UH1-B was called "Ned Kelly" and served in Vietnam
from 1968-69. It was the prototype of what came to be called the Bushranger
gunship:

The machine
gun belt holders were made from Green Stuff, rolled out, dipped in water, and
then embedded in 2.5mm cable ties (also dipped in water - so they don't stick)
and carefully peeled off in order to get a nice ridged pattern. They were then
shaped and fastened in position before they dried. In detail, what I did was
roll out the Green Stuff on a cutting board to the right size, then I laid a
cable tie over the top and pressed it down onto the Green Stuff. Any excess was
then trimmed off with a knife before carefully lifting the Green Stuff and
embedded cable tie off the cutting board and peeling them apart.
It is a
tricky job - you have to dip both the Green Stuff and the cable tie in water
first, and even then they may stick too hard to be separated.
It is best
only to use each cable tie once or twice as residual Green Stuff can ruin the
moulding surface and make it too sticky, but they are cheap enough and come in
large packets.
Originally
I was going to use the cable ties for the ammo holders, but they weren't bendy
enough and would have come loose even with super glue.

The coaxial
rocket pods and M60s were a very tricky proposition to mount on the model: I
had to use Liquid Nails and it took 3 attempts...
Some rides
for my ROKA platoon: ROKA M113s (circa 1966), based on this photo:

A fairly
good likeness!

I made five
of them in total (enough to transport my full ROKA platoon):

In the
various photos I have seen of them, the Koreans always had their M113s
"squared away" so I left these models free of deck detritus:

The crews
in the original photo were wearing Ray-Bans, so I thought "why not my guys
too"?
My next
project was a company of NVA. The main obstacle for these when using plastic
figures is finding enough poses, as the only commercially available box
available has a mix of NVA and VC figures. Italeri has come to the rescue by
releasing the old Spetsnaz figures. Various of them even have boonie hats. As
for the others, a few chops of the scalpel and they are good to go as NVA:

![]()

The Commie
horde (painting in progress):

This one
was sitting around half-finished for over a year so I thought I would take some
time out from painting the NVA horde and get it done:

Nothing
fancy - made using my quick and easy cut-up floor tile technique and a few odd
bits of plastic from the bits box.

It took a
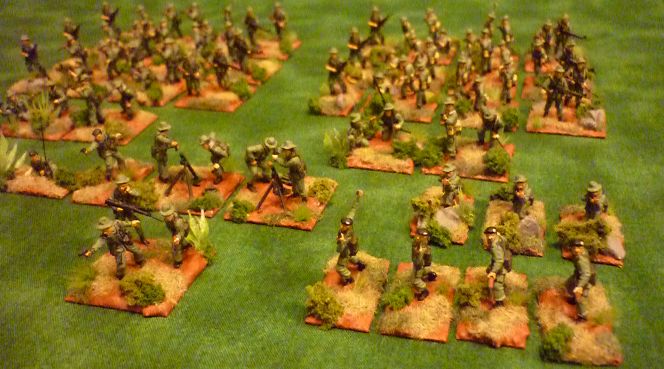
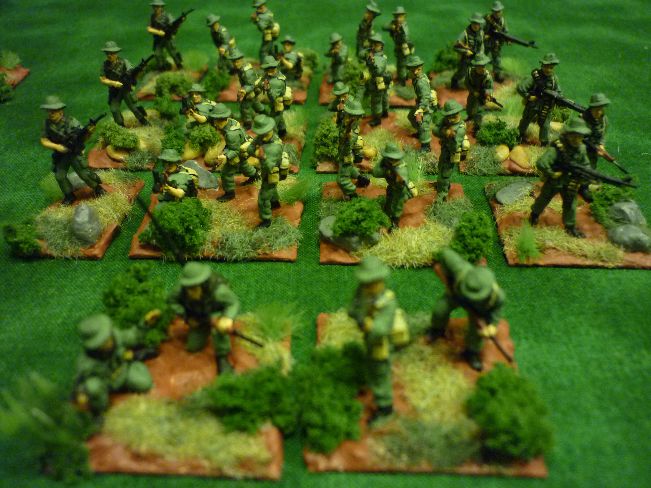
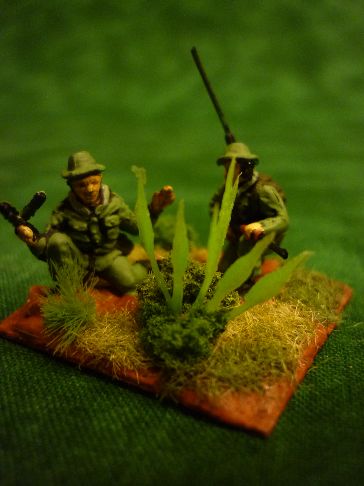
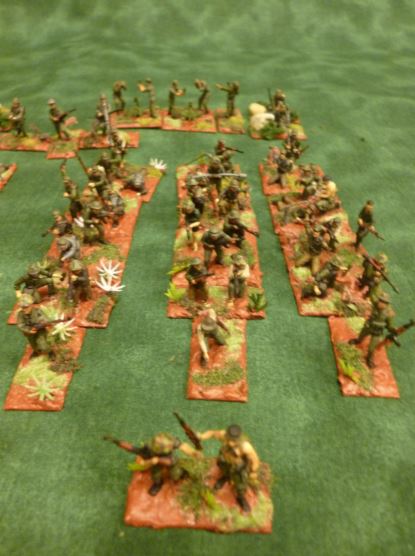
while but finally I finished my NVA company:

138 figures
in total; including 3 infantry platoons and 1 heavy weapons support platoon (at
the back in this shot);

Company
command stand and motorcycle dispatch rider:

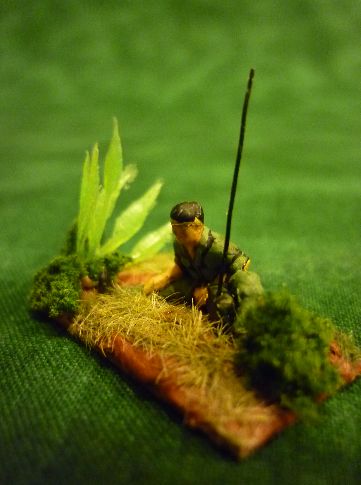
Forward
observer:

Snipers
(front view):

Snipers
(back view):

Sniper with
SKS rifle:

Sniper with
Dragunov rifle:

Platoon
command stand:

I belatedly
decided I needed to paint the gold stars in on the sun helmets - a red spot
just doesn't do it.
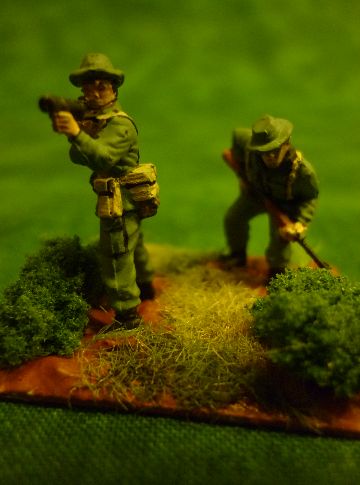
Squad
commander:

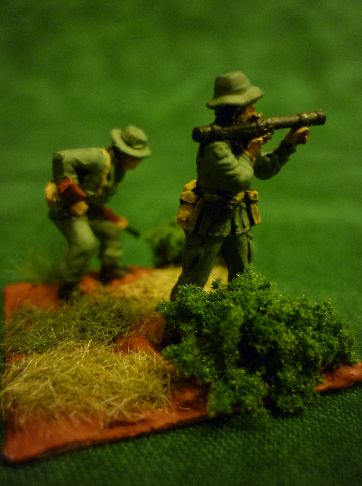
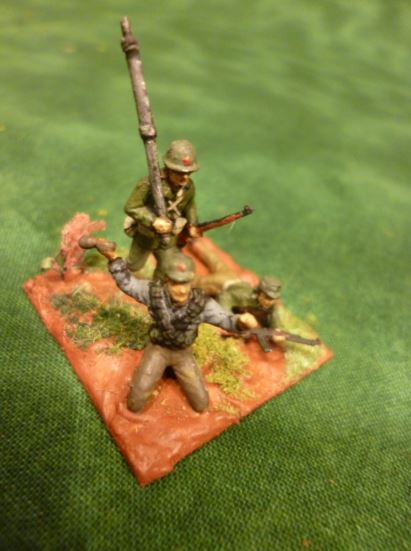
RPG team:
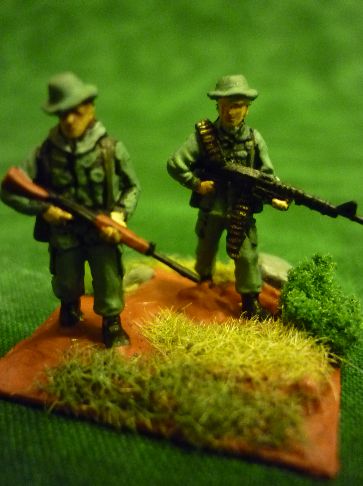
LMG team:
AK47 stands:

Kopye SPG-9
73 mm recoilless rifle team:

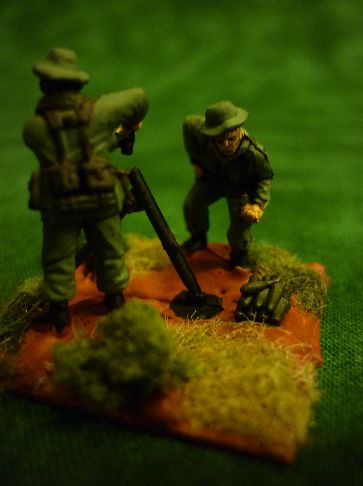
82 mm
mortar crew:

12.7 mm MG
crews:

Various of
the figures are from the old ESCI Viet Cong box (rereleased by both Revell and
Italeri).
And I used
the left-over AK47s from the weapons crew conversions to make some weapons
caches (the two at the back; the one at the front is a commercial lead
casting):

And a
couple of side projects I completed while I was doing all that lot....
A gents’
pissoir (every wargame table should have one):

Side
entrance:

It’s the
filthiest toilet in South Vietnam...

This is my
Vietnamese rendering of the Wills Victorian Gents' Toilet (Wills SS10).
And some
helicopter fun: this is a quick conversion of an AmerCom diecast gunship to an
early war dust-off helicopter:

It’s a nice
little model, with a well-detailed interior (control panel, seats) but
unfortunately I couldn’t work out how to open it without causing damage so it
is crewless.
And, from
the same Helicopter magazine series, a Sioux helicopter, complete with rockets
and recoilless rifle mountings:

A great
little model, but once again it is crewless due to the problem of how to get
the bubble canopy off without breaking it.
The Marines
are coming!

Here are
the US Marines, all painted: they are mainly Pegasus US Marines...

Two
infantry platoons, along with heavy weapons support. One of the infantry
platoons:

Some
ringers were thrown in to fill in gaps and add variety, as is the case with the
squad commanders:

The two
squad leaders on the left and in the middle are from the Caesar Miniatures
Counter-Terrorist Elite Forces box. I had to cut down the contemporary looking
"jarhead" helmet to make him look right, and took the modern backpack
off him, but the one on the left fits in pretty well. The guy in the middle was
used "as is". The guy with the carbine is from the IMEX Republic of
Korea Troops box - I had some left over from my ROKA platoon and it would have
been a shame to waste them.
The Pegasus
figures are some of the most dynamically posed plastic figures I have ever
painted:

M60 teams:


And a
couple of rifle stands:


Company
command group - the short guy is supposed to be an ARVN liaison/interpreter:


Platoon
command stand:

Various
odds and ends, including a forward observer, sniper team, medics and supply
stands:

Forward
observer:

Sniper
team. These 2 figures are from a well-known photo of the famous Marine sniper,
Carlos Hathcock:

A medic:

A supply
guy:

Heavy
weapons stands:

Super
bazooka team:

Weapons
detachment commander:

Flamethrowers:


60 mm
mortar team:

The guy
with the binoculars is from the same IMEX Koreans box, with an M16 stuck on his
back to bring him up to date. The radio guy is from the IMEX Korean War US Army
box, while the ARVN guy is an old Roco Minitanks figure I bought about 25 years
ago (NATO infantry?).
This guy
from the IMEX Koreans box too.
The Caesar
Miniatures Counter-Terrorist Elite Forces box offers some very nice figures
that can be used for Vietnam - various guys with boonie hats and some nice
kneeling figures with Special Forces helmets that will be perfect for
helicopter gun crew. I am still working out what to do with the Rambo figure
firing a bow though. ![]()
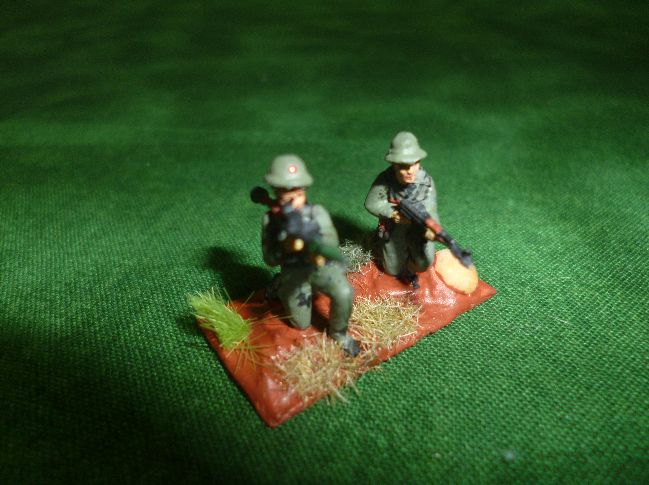
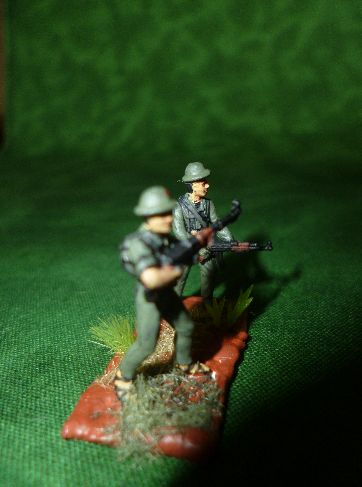
A quick
project: The ARVN Rangers statue in Saigon
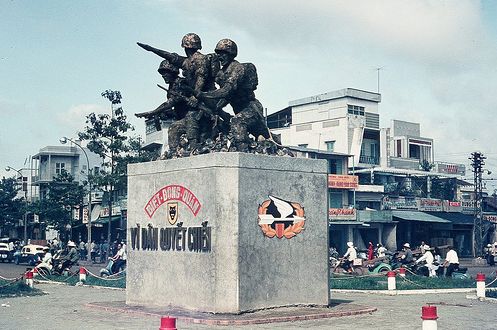
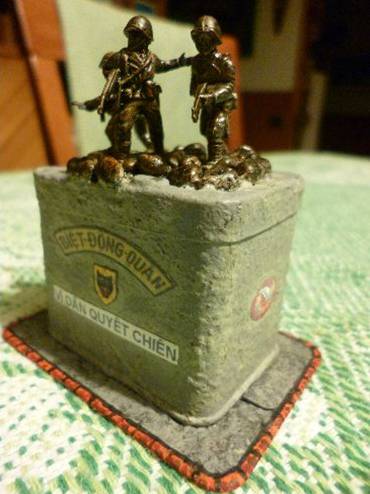
The plinth
is an old Coleman's mustard tin I had lying around that just happened to be
just the right size. I had to cut it down to the right height with tin snips.
The figures are from the Valiant American GIs box, which I originally got as
ARVN infantry but they are way too large for my plastics and even look odd
alongside the lead figures I have stockpiled. It's a shame because in relation
to themselves they are just the right proportions for ARVN - big helmets,
tight-fitting uniforms etc. Two of the three figures are a pretty good match
for the original statues. The guy in the middle is waving the wrong arm but
he'll do...
I should
write down how I did the bronze effect before I forget:
1. Matt
black spraypainted base coat
2. Thick
wash of matt acrylic reddish dark brown paint
3. Thick
wash of matt acrylic black paint
4.
Dry-brushed Tamiya bronze paint
5.
Highlighting with matt acrylic light brown paint
6. Thin
wash of matt acrylic black paint
7. Testor's
Dullcote spray varnish
Originally,
I intended just to make a VC sapper platoon, but it soon turned into a full
raiding party, with 2 platoons, a mortar section, flamethrowers, and a security
element too.

I had some
very clever ideas for figure conversions for these plastic guys, including
Bangalore torpedoes, pole charges, guys throwing RKG-3 bunker-busting grenades,
and sappers dealing with barbed wire.
Due to
extenuating real-life circumstances, they took 11 months to get done, but here
is the VC sapper raiding party, with 2 platoons, a mortar section,
flamethrowers, a security element, and a medical unit:


As well as
the usual suspects, I sourced these figures from a variety of different boxes,
including Italeri Soviet Special Forces, Imex Korean War Chinese and North
Koreans, Italeri and Waterloo 1815 WWII Japanese, and even the Airfix Luftwaffe
Personnel box. Consequently, the raiding party looks more motley and varied
than my normal NVA and VC units, and will definitely stand out if fielded
alongside them.
The raiding
party HQ stand:

The
security element - this is the only unit that has an LMG:

Two platoon
command stands with Italeri "Rambo" figures repurposed as sappers -
one with an SKS rifle and one with an explosive device:

The Imex
Chinese and North Koreans are very useful as they are carrying Soviet SMGs,
which the VC sappers used....

As well as
having what looks like the satchel charge from Hell:


Various of
the stands have figures working their way through barbed wire, which can be
combined for added scenic effect. Note the monster backpacks on the Imex
figures, and the nifty ChiCom grenade throwers, as well as the repurposed
Italeri "Rambo" machine gunners...

Imex Korean
War figure with a Molotov cocktail, along with an Airfix Luftwaffe Personnel
guy (that piston rod or whatever it is looks like a Bangalore torpedo to me):
Two Imex
Korean War figures with a Waterloo 1815 Japanese flagbearer - shave the flag
off and you have a monster Bangalore torpedo:
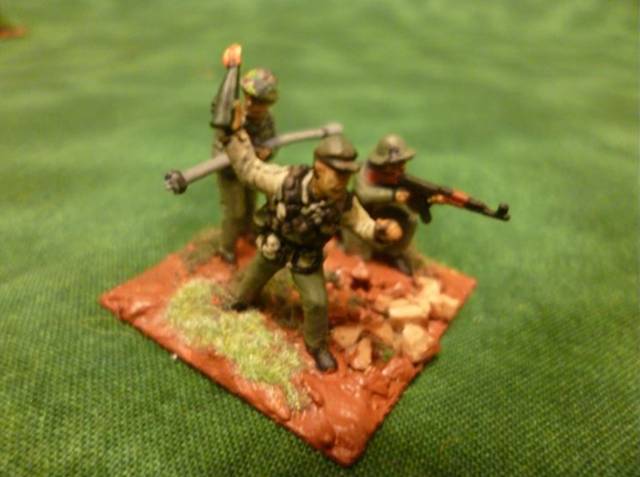
Flamethrowers
courtesy of the Waterloo 1815 Japanese box:

The mortar
unit, mainly made up of Imex North Koreans, along with a Waterloo 1815 Japanese
radio operator:

Medics
courtesy of the Airfix Luftwaffe Personnel box:

As well as
having guys with caps (not common in the ESCI/Italeri Viet Cong box for some
reason), the Imex Korean War Chinese and North Korean boxes strangely also
feature lots of guys with what look like AK47s. Consequently they are probably
better suited to South-East Asian conflicts in the 1960s and 70s than the
Korean War.s
While I was
painting these, I also completed a charity store find:


It is a
metal Japanese ashtray shaped like a traditional hut. It just happens to be
1/72nd scale and cost me a small fraction of what it would cost for an
equivalent mail-ordered resin building...
And here
are some more odds and ends - Some stacked crates (suitable for a firebase) and
a couple of market stalls:

The market
stalls are made by Wills: one for books and one for fruit and veg:

Some
roadside billboards. I should have put a vehicle beside them to show their size
- the middle one is as tall as an M48:

A couple of
ramshackle signs, also for my firebase (taken from old photos, complete with
spelling mistakes...):

Some
roadblocks. The rules I use require these for limiting movement along roads and
I needed more, so it was about time I custom-built some:

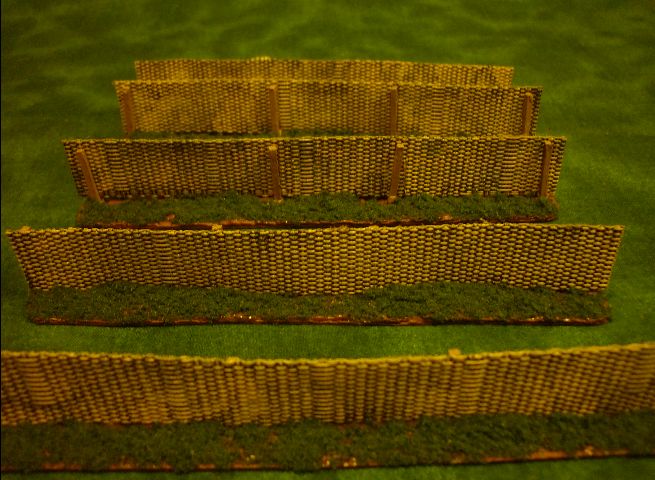
And some
walls, made from dowel and some free plastic domino things they were giving
away at the supermarket:

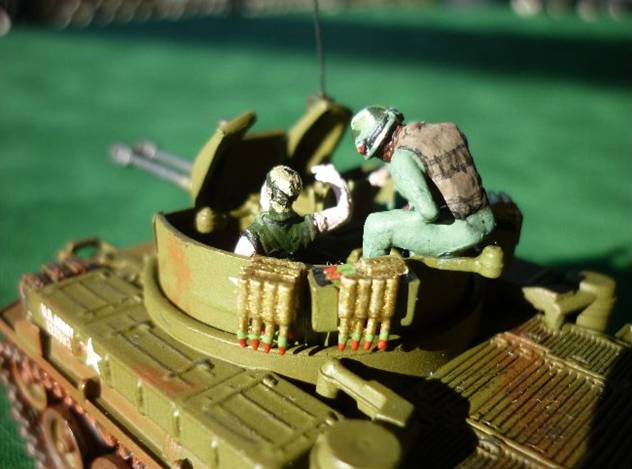
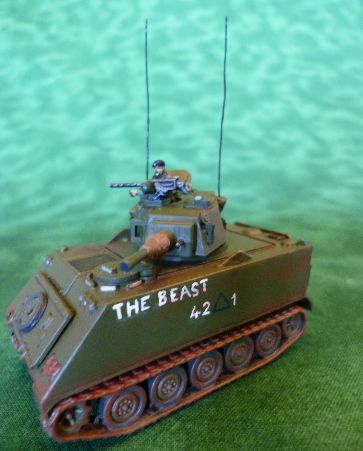
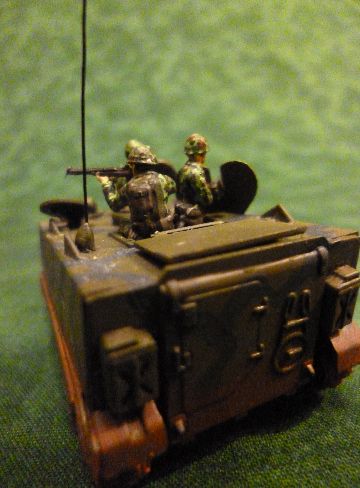
Here are my US M113 ACAVs, made from Airfix kits:

There's some low-level deck-top clutter, but I was mindful of breakability, so I have kept them relatively squared away:

The vehicle names are hand-painted:


The M60
machine gunners are ESCI figures with the original MGs as the Airfix M60s look
like Tonka Toys.
Many many
hours of work were involved, but this gives you an idea of what you need to set
up for Vietnam wargaming. Further pages in this section will be devoted to game
after-action reports…
© W.S. McCallum 19 November 2016, updated 8 January 2017


Web site © Wayne Stuart McCallum 2003-2017